Long before digital cameras were ubiquitous, and even long before the era of camcorders 8mm film was the standard for recording those special memories and slices of life for more than 50 years.
Back in the early 2010’s I worked in a photo studio where we offered services to digitize old formats so they could be preserved. One of the most challenging formats was 8mm film previous to this project we had 2 methods for capturing 8mm film:
First, we could setup a long cardboard box tunnel with a white screen at the back. A video recorder was setup facing the screen and the image was recorded. This setup had several drawbacks:
-
It took up a lot of space in a relatively small studio
-
This would introduce parallax errors to the recording
-
Any bumps or disturbances were recorded
-
The films had to be recorded in a single run
Our second option was to use a system of lenses and mirrors to enlarge and capture the image using the same recorder. This took up less space but introduced a lot of chromatic aberrations
Needless to say, neither of these options left us with a quality we were especially thrilled about. At the time the Raspberry Pi was the new hotness and the camera module had just been released so I had the idea What if we could get a camera right next to the film?
and so began the adventure…
After doing some research, some planning, and some consideration a few key requirements were defined:
-
The image quality needed to be stable with accurate colour reproduction
-
Minimal flicker should be visible in the final product.
-
The capture needs to place each frame accurately
-
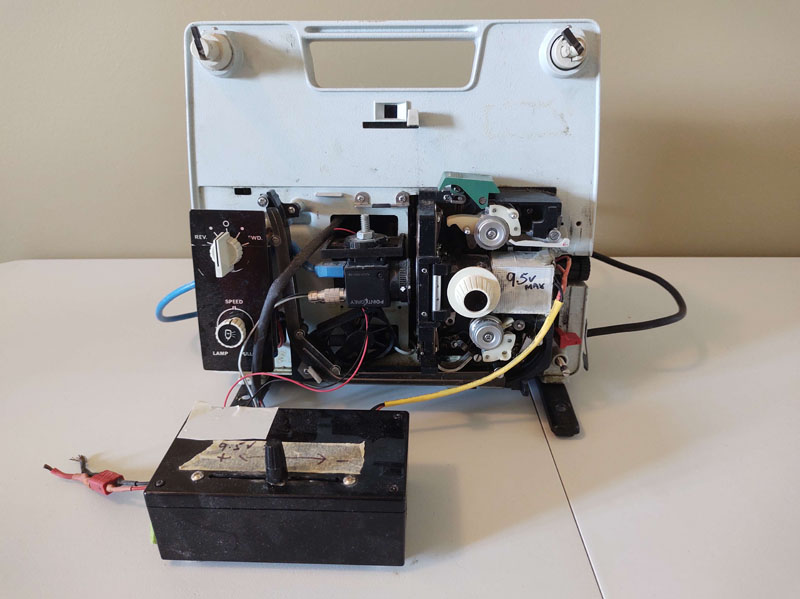
The bulb should be replaced with an LED
It was clear from a few tests that the Raspberry Pi camera wasn’t up to the job and so while researching a better camera option I designed a simple circuit to control the lights and fans…
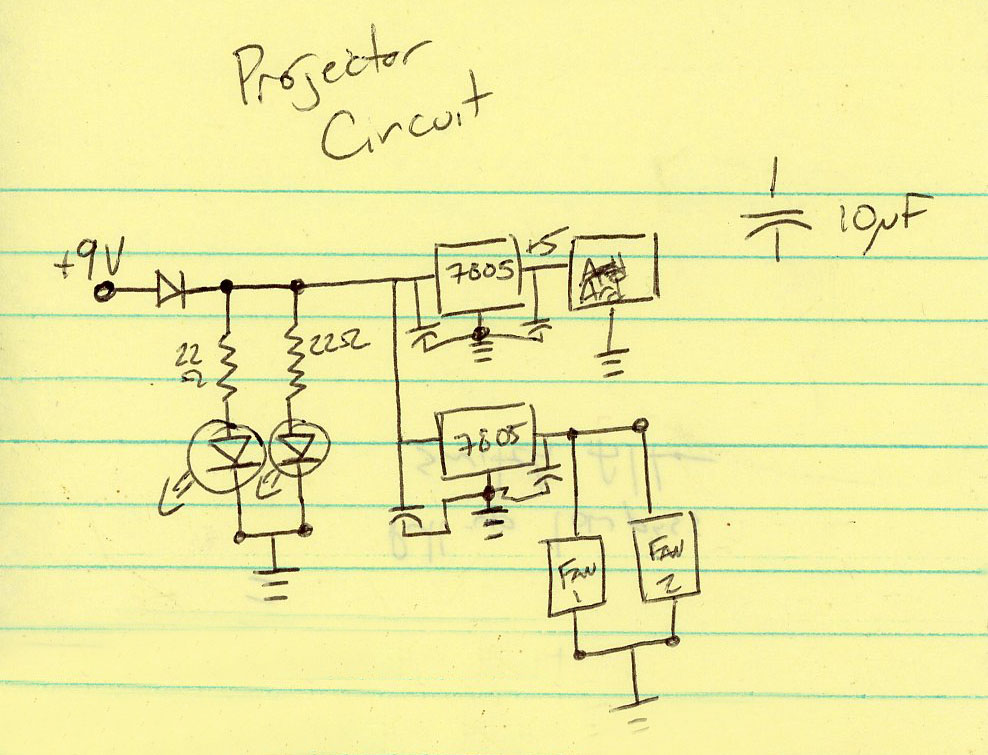
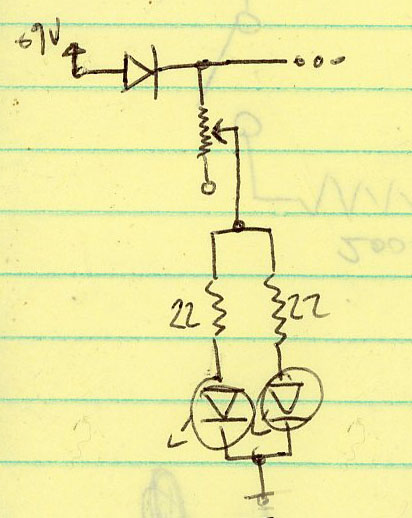
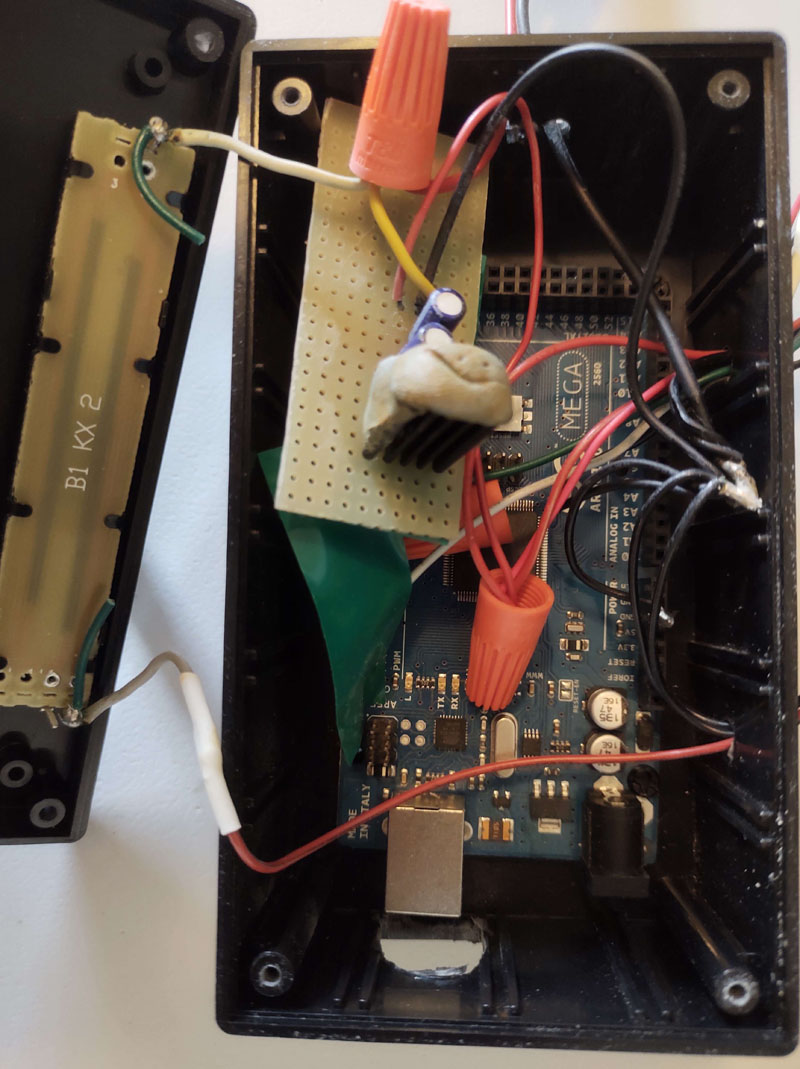
The heart of the circuit relies on two voltage regulators. One provides power to an Arduino while the other powers two fans - one for the camera and the other for the LED. One other thought that came up was making the LEDs adjustable. Since a lot of films would switch from bright outdoor scenes to dark indoor scenes being able to control the light levels would give us the option to capture the film at the optimal exposure. So the circuit was slightly modified to include a variable resistor.
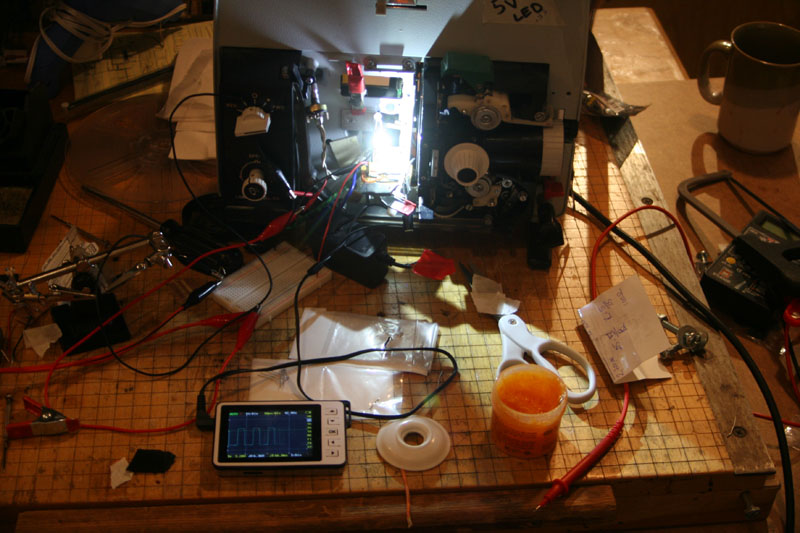
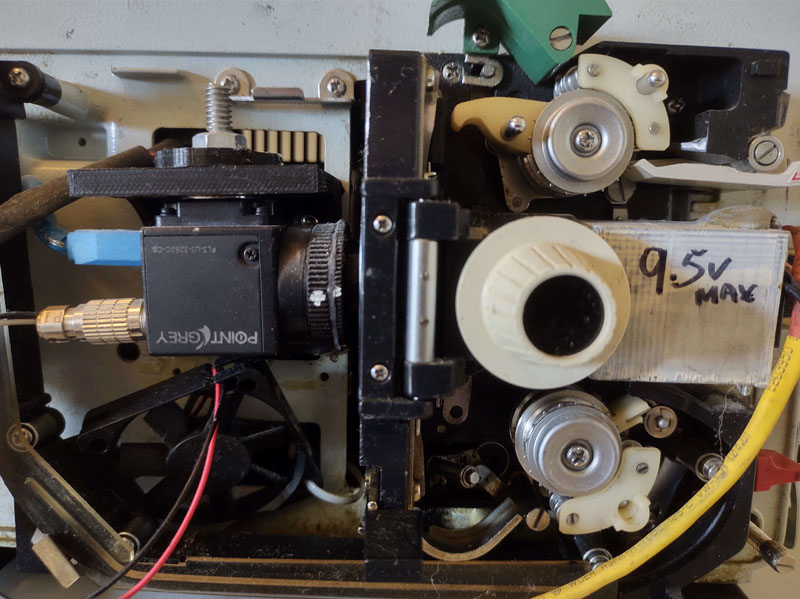
It was around this time that we found the ideal camera for the job, the Flea 3. At the time it was produced by a company called Point Grey before they were purchased by Flir. These camera were designed for use in inspection lines, supported a wide array of lenses, provided a simple external trigger option, and would allow for fast recording.
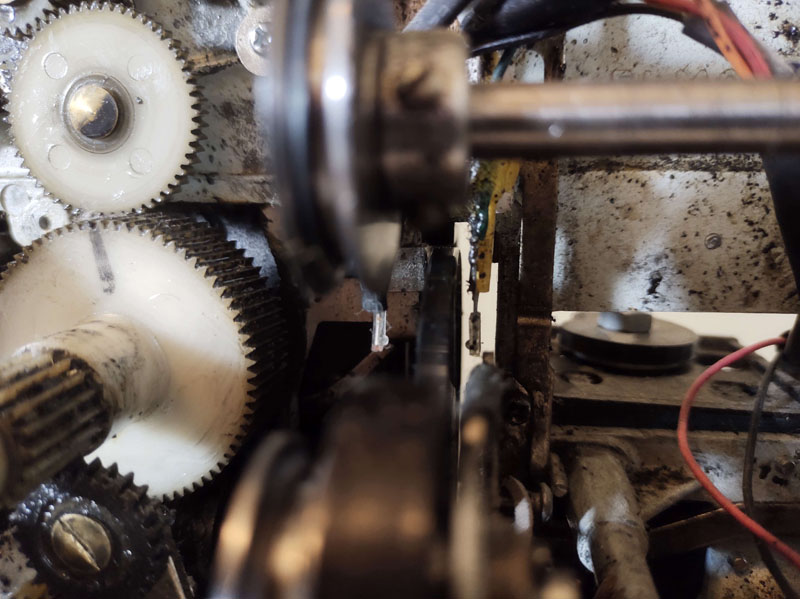
To know when to fire the camera I used an IR Emitter paired with an IR detector sandwiching the shutter of the camera…
The detector fed into an Arduino which allowed me to set a delay without having to physically move the pair. This along with the variable resistor was all wired into a project box…
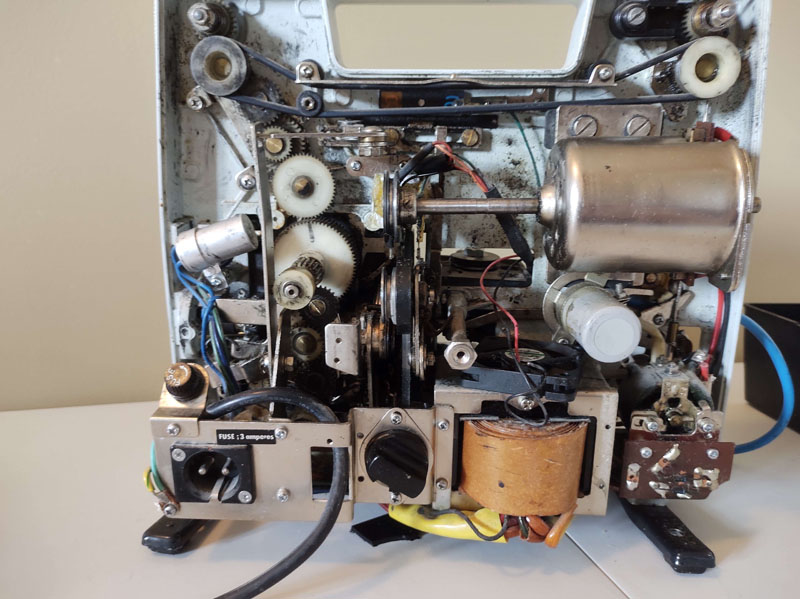
In the original version, the light was placed inside projector, however after some experimenting it actually worked better to place the lights on outside where the original lens would have sat. As a bonus this made it easy to open the projector to blow out any dust and also allowed the camera to be mounted much more rigidly on a 3d printed bracket.
The actual capturing and recording took place using the software provided by Point Grey over USB3. Once captured the footage could be further cleaned up in Premiere Pro and worked into a movie… but those details are a story for another day.
So how did it all work out?
This project was one of the first major projects where I designed the parts that made it up. Once that was done, capturing 8mm film became "my baby" within the studio and it gave me a new appreciation for how different things truly used to be. I feel blessed to have been able to save peoples precious memories, and there was something amazing about enabling grandparents to show their grandchildren movies from when they were children. I’ve included a sample of one of my captures, and of all the hundreds of hours of film I transferred, below is one of the greatest pieces of history I have ever preserved. Enjoy.